Sinterklaas (a Dutch tradition) and Christmas are almost here! Dutch stores are filled to the brim with chocolate letters, chocolate frogs and mice, chocolate Sinterklaasjes and all sorts of Christmas chocolates. These homemade chocolates are perfect for this most chocolatey month of the year. You can add any flavour you think would be tasty in combination with chocolate (turns out I find many things will go with chocolate, so I have made many different flavours, amongst which many classic combinations).
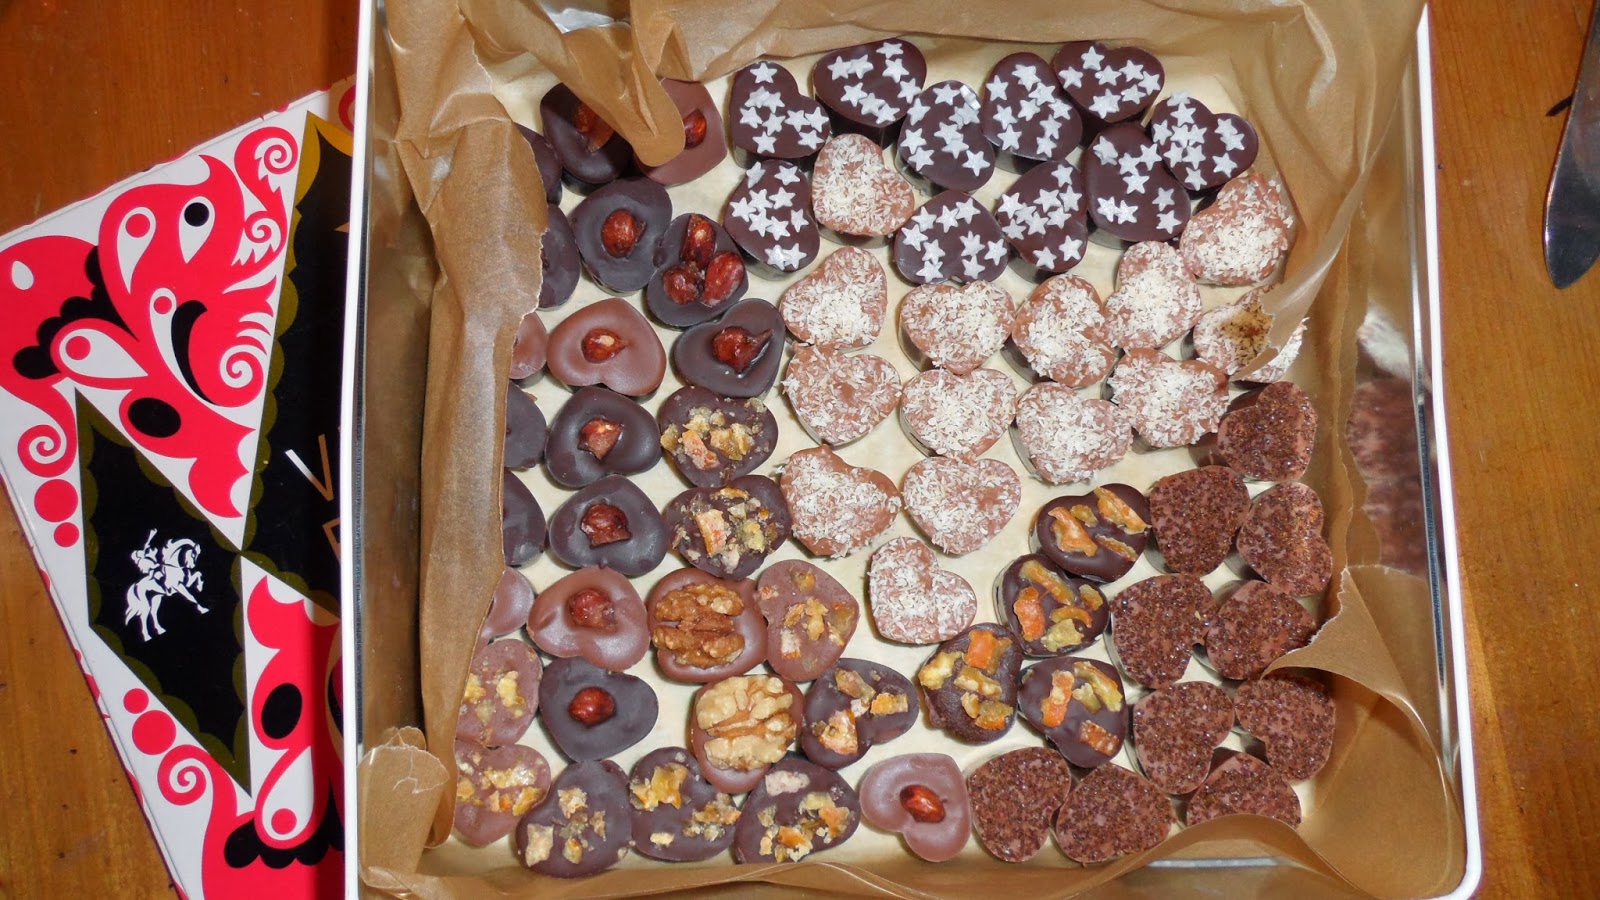
Chocolates in this picture:
- Glazed almond in dark chocolate and in milk chocolate
- Star chocolates with just milk chocolate (for those who love their milk chocolate plain and simple)
- Coconut chocolates with a creamy coconut core
- Glazed orange zest chocolates
- Cinnamon chocolates with a crispy sweet cinnamon core and brown sugar topping
- Walnut chocolates
Chocolates in this picture:
- Glazed cherry chocolates
- Christmas chocolates with white and red chocolate and red Sugar
- Christmas chocolates with milk chocolate and red chocolate.
(- and two runaway star chocolates)
Chocolate making tips and tricks
You need:
- Good quality white, milk and dark chocolate. For the Christmas chocolates I have used red melting chocolate (for Dutch readers, you can buy red chocolate (and many other colours) in the Jumbo supermarkets €2,49).
- Chocolate molds. These heart shaped ones are from Flying Tiger (Tiger in other countries in which Tiger has not lost the name-lawsuit) and they cost €3.
- Fillings. You can use anything you find tasty in a chocolate. I have used glazed orange zest (this turns out to be quite easy to make, I'll explain how), walnut, glazed almonds (also smooth sailing when making it yourself), fudge, glazed cherries, coconut, cinnamon and chili powder (yes, I was intrigued by the chili chocolate in 'Chocolat', it wouldn't have crossed my mind, but now I know about it, it seems like a really good idea to combine hot chili with the sweet and smooth chocolate).
- Toppings. I used silver stars (Jumbo, €1,79) and red Sugar (Action, €1,69) for the Christmas and star chocolates. For the rest of the chocolates I used the ingredients I put in the chocolates to make visible what flavour they are.
These chocolates are fudge chocolates. I have filled them with chunky bits of fudge and sprinkled tiny fudge cubes on top.
These silver glittery stars have spruced up the plain milk chocolates and dark chocolates.
How to glaze fruit and nuts
These glazed cherries are store bought. However, it turns out to be quite easy to make your own glazed fruit and nuts.
This is what you need:
- Orange zest (try to avoid including the white part because it's bitter) and almonds.
- Sugar
- Water
To make glazed orange:
1) Boil the zest three times (this rids the orange zest of its bitter flavour). You can put your zest in a strainer and hang it in the boiling water. Throw away the water and bring to boil in the clean water twice.
2) Add some water to the zest and add a few tablespoons of sugar. Let the mixture simmer and stir until there is no more water left. You can spread your glazed orange zest on baking paper and let it cool. Make sure the sugar has no change to scorch.
When making glazed almonds you can follow the same steps as when making glazed orange zest, skipping the three times boiling step.
Filling
Most of the fillings for the chocolates are straightforward:
-
Almond chocolates - fill the mold but leave a little room because the almond is quite bulky. Push the almond in the chocolate, leaving it to stick out a bit.
-
Glazed orange chocolates - fill half of the mold with chocolate and add a few pieces of glazed orange zest. Fill with chocolate and top with the zest.
-
Cherry chocolates - same as the almond chocolates; push the cherry in the chocolates and leave it to stick out (it's so lovely and shiny and transparent).
-
Walnut chocolates - put little chunks of walnut in the chocolate and top with half a walnut.
-
Chili chocolates - add chili powder (and if you are in a brave and fearless mood, pieces of chili pepper) to your chocolate and top with little pieces of chili (I have avoided the infamous seeds) so you can recognize them. I would not want to be caught off guard by a chili chocolate.
-
Fudge chocolates - put little chunks of fudge in the chocolates and top with tiny chunks of fudge.
There are a few ingredients that couldn't just be chucked into the chocolate:
-
Coconut chocolates - I have added coconut flakes to the chocolate and also added a coconut core. The flakes in the chocolate and the core are roasted coconut flakes (roast for a few minutes in the oven at 175ºC). The core consists of the flakes, some white sugar (for crispness), brown sugar (for gooeyness) and some cream. Fill half the mold with the chocolate-coconut mixture, add the core and fill with the rest of the chocolate. Top with plain coconut flakes.
-
Cinnamon chocolates - this chocolate is similar to the coconut chocolate. The core of the cinnamon chocolate exists of cinnamon, white sugar and brown sugar. Top with brown sugar and cinnamon.
Thanks for taking a look! If you have any suggestions for fillings or toppings, I would love to hear them.


.jpg)


