Sunday, 1 December 2013

Homemade winter chocolates


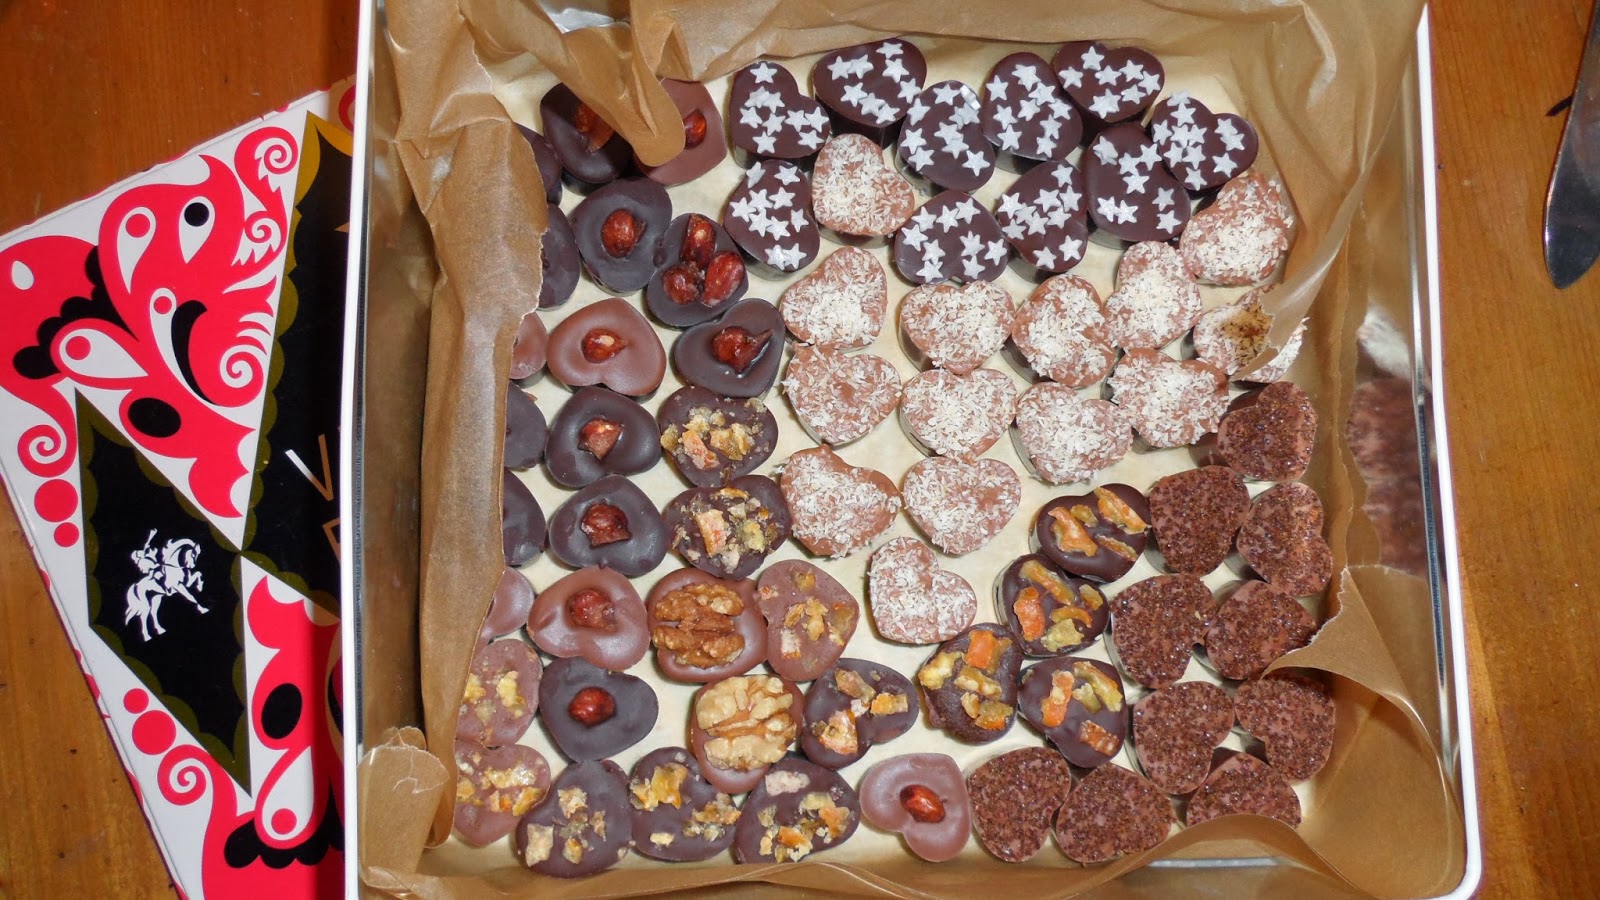
Sinterklaas (a Dutch tradition) and Christmas are almost here! Dutch stores are filled to the brim with chocolate letters, chocolate frogs and mice, chocolate Sinterklaasjes and all sorts of Christmas chocolates. These homemade chocolates are perfect for this most chocolatey month of the year. You can add any flavour you think would be tasty in combination with chocolate (turns out I find many things will go with chocolate, so I have made many different flavours, amongst which many classic combinations).


Chocolates in this picture:
 
- Glazed almond in dark chocolate and in milk chocolate
- Star chocolates with just milk chocolate (for those who love their milk chocolate plain and simple)
- Coconut chocolates with a creamy coconut core
- Glazed orange zest chocolates
- Cinnamon chocolates with a crispy sweet cinnamon core and brown sugar topping
- Walnut chocolates 


Chocolates in this picture:
 
- Glazed cherry chocolates
- Christmas chocolates with white and red chocolate and red Sugar
- Christmas chocolates with milk chocolate and red chocolate.
(- and two runaway star chocolates) 


 Chocolate making tips and tricks

You need:

- Good quality white, milk and dark chocolate. For the Christmas chocolates I have used red melting chocolate (for Dutch readers, you can buy red chocolate (and many other colours) in the Jumbo supermarkets €2,49).
- Chocolate molds. These heart shaped ones are from Flying Tiger (Tiger in other countries in which Tiger has not lost the name-lawsuit) and they cost €3.
- Fillings. You can use anything you find tasty in a chocolate. I have used glazed orange zest (this turns out to be quite easy to make, I'll explain how), walnut, glazed almonds (also smooth sailing when making it yourself), fudge, glazed cherries, coconut, cinnamon and chili powder (yes, I was intrigued by the chili chocolate in 'Chocolat', it wouldn't have crossed my mind, but now I know about it, it seems like a really good idea to combine hot chili with the sweet and smooth chocolate).
-  Toppings. I used silver stars (Jumbo, €1,79) and red Sugar (Action, €1,69) for the Christmas and star chocolates. For the rest of the chocolates I used the ingredients I put in the chocolates to make visible what flavour they are.

 
These  chocolates are fudge chocolates. I have filled them with chunky bits of fudge and sprinkled tiny fudge cubes on top.
 
 
These silver glittery stars have spruced up the plain milk chocolates and dark chocolates.
 
How to glaze fruit and nuts


These glazed cherries are store bought. However, it turns out to be quite easy to make your own glazed fruit and nuts.

This is what you need:

- Orange zest (try to avoid including the white part because it's bitter) and almonds.
- Sugar
- Water

To make glazed orange:
1) Boil the zest three times (this rids the orange zest of its bitter flavour). You can put your zest in a strainer and hang it in the boiling water. Throw away the water and bring to boil in the clean water twice.
2) Add some water to the zest and add a few tablespoons of sugar. Let the mixture simmer and stir until there is no more water left. You can spread your glazed orange zest on baking paper and let it cool. Make sure the sugar has no change to scorch.

When making glazed almonds you can follow the same steps as when making glazed orange zest, skipping the three times boiling step.

 
Filling


Most of the fillings for the chocolates are straightforward:

- Almond chocolates - fill the mold but leave a little room because the almond is quite bulky. Push the almond in the chocolate, leaving it to stick out a bit.

- Glazed orange chocolates - fill half of the mold with chocolate and add a few pieces of glazed orange zest. Fill with chocolate and top with the zest.

-  Cherry chocolates - same as the almond chocolates; push the cherry in the chocolates and leave it to stick out (it's so lovely and shiny and transparent).

- Walnut chocolates - put little chunks of walnut in the chocolate and top with half a walnut.

- Chili chocolates - add chili powder (and if you are in a brave and fearless mood, pieces of chili pepper) to your chocolate and top with little pieces of chili (I have avoided the infamous seeds) so you can recognize them. I would not want to be caught off guard by a chili chocolate.

- Fudge chocolates - put little chunks of fudge in the chocolates and top with tiny chunks of fudge.


There are a few ingredients that couldn't just be chucked into the chocolate:

- Coconut chocolates - I have added coconut flakes to the chocolate and also added a coconut core. The flakes in the chocolate and the core are roasted coconut flakes (roast for a few minutes in the oven at 175ÂșC). The core consists of the flakes, some white sugar (for crispness), brown sugar (for gooeyness) and some cream. Fill half the mold with the chocolate-coconut mixture, add the core and fill with the rest of the chocolate. Top with plain coconut flakes.

- Cinnamon chocolates - this chocolate is similar to the coconut chocolate. The core of the cinnamon chocolate exists of cinnamon, white sugar and brown sugar. Top with brown sugar and cinnamon.


 Thanks for taking a look! If you have any suggestions for fillings or toppings, I would love to hear them.


Sunday, 24 November 2013

Christmas tree pillow forest DIY

This little forest is a lovely and easy DIY project for Christmas. The pattern is really simple and making the trees is pretty straight forward as well, a good thing when you are planning on making a whole forest. You can use any kind of fabric you like and you can make the trees in every size.


You need:

- fabric in different patterns and if you like, in different colours
- brown felt for the trunks
- material to stuff your pillows
- if you like you can add sequins and beads to decorate your trees

When sewing the triangles, leave room in the centre at the bottom of the tree so you can stuff the pillow and add the trunk afterward.


Thanks a bunch for taking a look at the Christmas forest.


Thursday, 7 November 2013

BBC Sherlock Mug DIY

My favourite BBC series and my favourite Pinterest fandom have provided a wealth of beautiful images and lovely fan art. Inspired by these images I have been wanting to make Sherlock into something solid.


I thought the 'Just deduce it' was the best Sherlock Pinterest pin and a mug would be the perfect place for it. So I bought a black and a brown glass and porcelain pen and drew the text and the pipe on the plain white mugs. Easy as pie. They do still have to go in the oven for 90 minutes at 160°C. 


I love this DIY because, with only two colours needed, it is easy, inexpensive and lovely to draw.

Thanks again for taking a look!

Monday, 4 November 2013

About

Ella & Louis is a company/ label that I have dreamed about having for a large part of my life and that is finally coming into being. This blog will show the process of starting your own company and all the bumps in the road that leads to a thriving company (not thinking for a moment it won't get there).


ELLA EN LOUIS


I named the company after Ella Fitzgerald and Louis Armstrong, because to me, they symbolize a passion and a strength in making your dreams come true and working hard to achieve that. Music from different times and different cultures changes your way of thinking. To me, Ella and Louis inspire me to do my best to live my best life, choosing to do what I really want to do and putting energy and effort into that.

Just don't give up trying to do what you really want to do.
Where there is love and inspiration,
I don't think you can go wrong.

Ella Fitzgerald


THE TOTE BAG

The tote bag is a product I love, it is a fashion classic with endless possibilities. Tote bags will be the first line of products of Ella & Louis. I would love to create black totes with folk embroidery, totes made of vintage fabrics, hand-printed classic white totes and also a series of book totes. This series of book totes lies close to my heart. I have studied British Literature and I wanted to include my favourite books in my products. It's a way to keep them close.


The test Book Tote was a Virginia Woolf, Mrs. Dalloway Tote. I love this classic British novel, especially this quote. The quote represents a sense of Britishness, a sense of pride but also a certain darkness that I think are often present in British literature.

I know where I want this company to go, but the road there will be a long and bumpy one. I am really excited about all the possibilities it offers, and a bit scared as well having giving all this freedom to steer this ship. I will keep you posted!


Sunday, 27 October 2013

Sunday, 1 September 2013

DIY Book Tote - Mrs. Dalloway

For the Mrs. Dalloway Book Tote, I wanted to include both the Big Ben (because it is so closely linked to the book and because it is such a lovely image), and the beautiful Big Ben passage from Mrs. Dalloway as well.

For having lived in Westminster - how many years now? over twenty, - one feels even in the midst of the traffic, or waking at night, Clarissa was positive, a particular hush, or solemnity; an indescribable pause; a suspense (but that might be her heart, affected, that said, by influenza) before Big Ben strikes. There! Out it boomed. First a warning, musical; the the hour, irrevocable. The leaden circles dissolved in the air.
Virginia Woolf, 'Mrs. Dalloway'
 
 
It took up many many hours of embroidering because I wanted to embroider the Big Ben passage in handwriting. In hindsight, it may not have been such a good idea, but I do love how it turned out. And also, it feels special in a way to spend so much time embroidering a beautiful passage from a book you love.
 

Thanks so much for reading. What passages from books or songs would you like to embroider? I would love to hear your opinion.

Wednesday, 14 August 2013

DIY Ministry of Silly walks clock

I found this Monty Python clock on Pinterest and thought it was the best post. I was delighted when I found out there was a complete 'how-to-make' on the internet. Thank you so much Susanne for sharing how to make it. You can see Susanne´s tutorial on how to make your own Silly walks clock here.

If you do try to make it you won´t be disappointed. It was really easy and the result is great. I am chuffed to bits with my own silly walks clock.


Thanks so much for taking a peak at the silly walks clock.